Dryer Vent Installation: Proper Routing for Safety & Efficiency
Proper dryer vent installation is critical for fire safety, energy efficiency, and appliance longevity. A poorly routed or incorrectly installed dryer vent restricts airflow, causes lint buildup, extends drying times, and significantly increases fire risk. According to the U.S. Fire Administration, dryers cause approximately 2,900 home fires annually-most due to failure to clean vents and improper installation. This guide covers current code requirements, material specifications, routing best practices, and when professional installation is the right choice.
Table of Contents
- Code Requirements Overview
- Maximum Vent Length: The 35-Foot Rule
- Proper Materials
- Routing Best Practices
- Common Installation Mistakes
- When to Hire a Professional
- Installation Cost in Florida
- Maintenance After Installation
- FAQs
Code Requirements Overview
Dryer vent installation requirements are governed by the International Residential Code (IRC) and International Mechanical Code (IMC), with local amendments varying by jurisdiction. Florida follows the Florida Building Code, which incorporates IRC/IMC standards with state-specific modifications.
Key Code Points (IRC/IMC 2021-2024)
Duct material and diameter:
- Exhaust ducts must be smooth interior metal with minimum thickness of 0.016 inches
- Standard diameter is 4 inches (must match dryer manufacturer specifications)
- Plastic, PVC, and vinyl ducts are prohibited for dryer exhaust
Termination requirements:
- Must terminate to the outdoors (never into attics, crawl spaces, garages, or wall cavities)
- Exterior hood must have a backdraft damper
- Screens are not permitted at the termination (they trap lint and create blockages)
Transition duct (dryer-to-wall connection):
- Must be UL 2158A listed/labeled
- Single length, maximum 8 feet
- Cannot be concealed within walls, floors, or ceilings
Support and sealing:
- Ducts must be properly supported to prevent sagging
- Joints sealed with appropriate foil tape or clamps (not cloth duct tape)
- Male/crimped end must point in the direction of airflow
Labeling requirement:
- When equivalent length exceeds manufacturer specifications, a permanent label indicating total length must be placed near the dryer connection
Florida-Specific Considerations
- Florida Building Code incorporates IRC with amendments
- High humidity and coastal conditions affect material choices (corrosion-resistant fittings recommended for coastal areas)
- Multi-family and condo installations often require longer runs through chases
- Always verify requirements with your local Authority Having Jurisdiction (AHJ)
Maximum Vent Length: The 35-Foot Rule
The maximum allowable dryer vent length is one of the most important-and most misunderstood-aspects of installation.
The Basic Rule
Modern code (IRC M1502.4.6) specifies:
- Maximum 35 feet from the connection at the dryer transition duct to the exterior termination
- This is measured along the actual duct path, not a straight line
Equivalent Length Deductions for Fittings
Every elbow and fitting reduces your allowable length. Common deductions:
| Fitting Type | Equivalent Length Deduction |
|---|---|
| 90-degree elbow (mitered) | 5 feet |
| 45-degree elbow (mitered) | 2.5 feet |
| 90-degree long-radius elbow | Less than 5 feet (varies) |
Example calculation:
- Available: 35 feet maximum
- Your installation has: two 90-degree elbows (-10 feet) and one 45-degree elbow (-2.5 feet)
- Remaining allowable straight run: 22.5 feet
Older Code References
If you're reading older articles or dealing with older installations, you may see references to a 25-foot maximum. This was from previous code versions. Current code allows 35 feet, but your local AHJ's adopted code version controls-always verify.
Manufacturer Specifications May Differ
Some dryer manufacturers specify shorter maximum lengths than code allows. The more restrictive specification applies. Always check your dryer's installation manual.
What If Your Run Exceeds the Maximum?
Options when the calculated equivalent length exceeds limits:
- Re-route to reduce length and elbows (preferred solution)
- Install a code-compliant dryer exhaust duct power ventilator (not a simple "booster fan"-it must be listed for dryer exhaust use)
- Relocate the dryer closer to an exterior wall
Proper Materials
Using the right materials is non-negotiable for safety and code compliance.
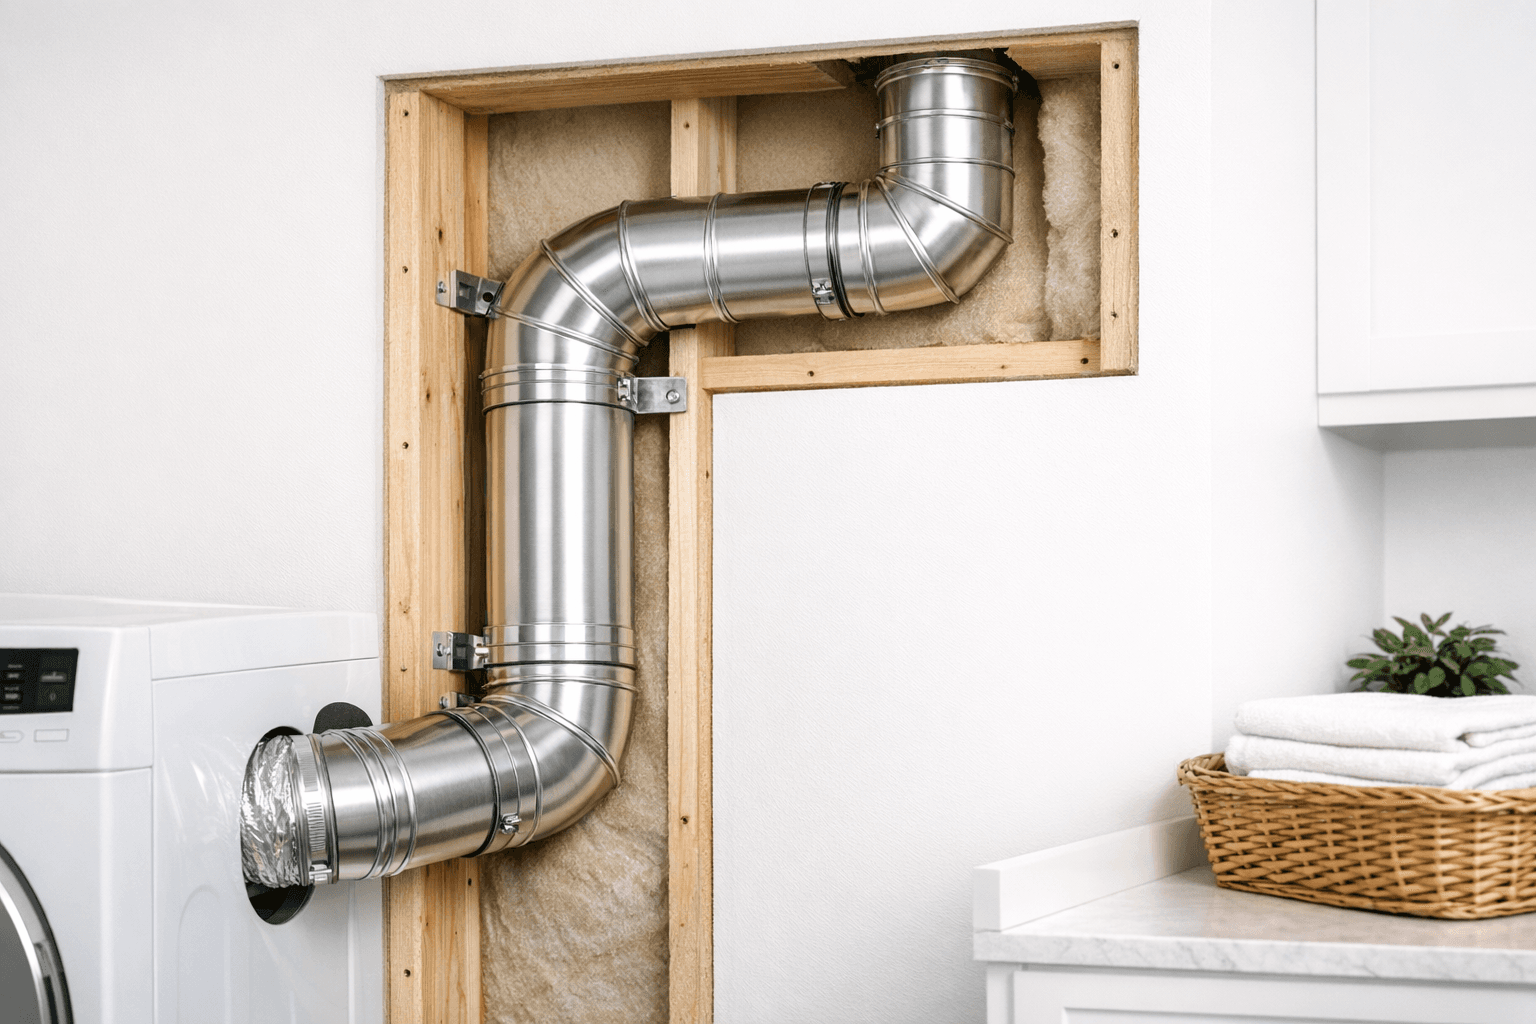
For the Main Duct Run: Rigid Smooth Metal
Required specifications:
- Rigid metal duct (galvanized steel or aluminum)
- Smooth interior surface (reduces lint accumulation)
- 4-inch diameter (standard; verify with dryer specs)
- Minimum 0.016-inch thickness
Why rigid metal?
- Smooth interior minimizes lint buildup
- Rigid construction resists crushing and sagging
- Fire-resistant properties
- Code-compliant nationwide
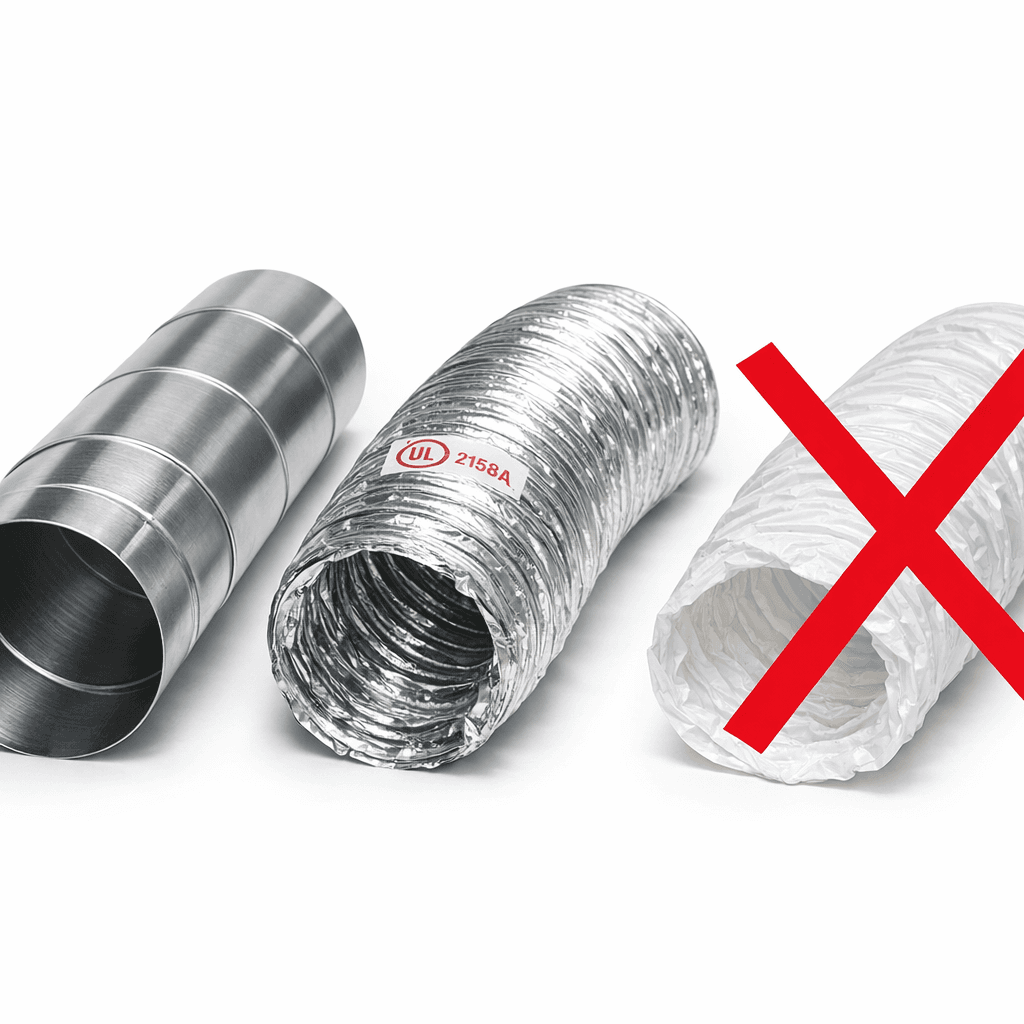
For the Transition Duct: UL 2158A Listed
The transition duct connects the dryer to the wall outlet:
- Must be UL 2158A listed (this standard specifically addresses fire safety for dryer transition ducts)
- Single length, maximum 8 feet
- Semi-rigid aluminum is the best choice (maintains shape better than foil)
- Cannot be concealed in walls or ceilings
Materials to Avoid
Never use these for dryer exhaust:
| Material | Why It's Prohibited |
|---|---|
| Plastic/PVC | Melts, creates toxic fumes, fire hazard |
| Vinyl flex duct | Not fire-resistant, sags, traps lint |
| Thin foil accordion duct | Crushes easily, creates lint traps, fire hazard |
| Ribbed/corrugated duct (for main run) | Ridges catch lint, restricts airflow |
Termination Hood
- Metal construction with backdraft damper
- No screen (screens clog with lint quickly)
- Damper must open freely when dryer operates
- Damper should close when dryer is off (prevents pest entry and backdrafts)
Routing Best Practices
Proper routing maximizes airflow, minimizes lint accumulation, and ensures safety.
Keep It Short and Straight
Every foot of duct and every elbow adds resistance:
- Shortest path wins when possible
- Fewer elbows = better airflow = faster drying
- Plan the route before cutting into walls
Maintain Proper Slope
- Horizontal runs should slope slightly downward toward the exterior (1/4 inch per foot minimum)
- Prevents condensation pooling inside the duct
- Helps lint move toward the termination
Assemble Joints Correctly
Critical: Male/crimped end points in the direction of airflow (toward the outside)
- This allows lint to flow smoothly
- Reversed joints create ledges where lint accumulates
- Seal joints with foil tape or clamps
Avoid Fasteners That Protrude
- Never use screws that penetrate into the airstream
- Protruding fasteners catch lint and create blockage points
- Use foil tape and clamps to secure joints instead
Support Horizontal Runs
- Support duct at intervals specified by code (typically every 4-6 feet)
- Prevent sagging-sags become lint traps
- Use proper hangers, not wire or zip ties that can crush the duct
Termination Location
- Exterior wall termination is preferred (shorter run, easier maintenance)
- Roof terminations require longer runs and are harder to clean
- Avoid terminating near:
- Windows or doors (moisture and lint issues)
- Air intake vents
- Gas meters or regulators
- Areas where lint accumulation would be problematic
Accessibility for Future Cleaning
- Plan for maintenance access at both ends
- Consider access panels if the duct runs through finished spaces
- Document the routing (photos, diagrams) for future reference
Common Installation Mistakes
These errors cause performance problems, code violations, and safety hazards.
1) Using Prohibited Materials
The mistake: Installing plastic, vinyl, or thin foil duct to save money or because it's "easier."
The consequence: Code violation, fire hazard, lint buildup, eventual failure.
The fix: Always use rigid smooth metal for the main run and UL 2158A transition duct.
2) Exceeding Maximum Length
The mistake: Running duct too far or using too many elbows without calculating equivalent length.
The consequence: Restricted airflow, extended drying times, overheating, lint accumulation deep in the line.
The fix: Calculate equivalent length before installation. If it exceeds limits, re-route or use approved power ventilation.
3) Terminating Inside the Building
The mistake: Venting into attics, crawl spaces, garages, or wall cavities-sometimes with a "lint trap bucket."
The consequence: Major code violation, moisture damage, mold growth, fire hazard, indoor air quality problems.
The fix: Always terminate outdoors with a proper hood and backdraft damper.
4) Installing Screens at the Termination
The mistake: Adding a screen to keep pests out.
The consequence: Screen clogs with lint quickly, blocking airflow completely.
The fix: Use a proper hood with a backdraft damper (no screen). The damper keeps pests out when the dryer isn't running.
5) Screws in the Ductwork
The mistake: Using sheet metal screws to secure joints.
The consequence: Screw tips protruding into the airstream catch lint, creating blockages.
The fix: Secure joints with foil tape and appropriate clamps.
6) Crushed or Kinked Transition Duct
The mistake: Pushing the dryer too close to the wall, crushing the transition duct behind it.
The consequence: Severe airflow restriction, overheating, rapid lint buildup.
The fix: Leave adequate clearance. Consider a dryer box (recessed wall box) for tight spaces.
7) Poor Joint Assembly
The mistake: Assembling joints with male ends facing the wrong direction, or leaving joints unsealed.
The consequence: Lint accumulation at joint ridges, air leaks, reduced efficiency.
The fix: Male/crimped end toward the outlet. Seal all joints with foil tape.
8) Unsupported Horizontal Runs
The mistake: Long horizontal runs without proper support.
The consequence: Duct sags over time, creating low points where lint accumulates and moisture collects.
The fix: Support duct at proper intervals per code.
When to Hire a Professional
DIY dryer vent installation is possible for simple, short runs-but many situations require professional expertise.
Hire a Professional When:
The run is complex:
- Routing through walls, ceilings, or attic spaces
- Multiple turns or long distances
- Rooftop termination required
Access is difficult:
- Second-floor laundry rooms
- Tight utility closets
- Exterior termination at height
You're unsure about code:
- New construction or major renovation requiring permits
- Condo or multi-family installations with specific requirements
- Uncertainty about local amendments to building code
Existing system needs correction:
- Replacing prohibited materials with compliant duct
- Rerouting to reduce length
- Correcting previous installation errors
Safety is a concern:
- Evidence of overheating or burning smells
- Heavy lint accumulation in existing duct
- Suspected damage or disconnection
What a Professional Installation Includes
A quality professional installation should include:
- Assessment of the best routing option
- Proper materials (rigid metal, UL 2158A transition)
- Code-compliant installation with correct joints, supports, and termination
- Airflow verification after installation
- Documentation of the equivalent length calculation
- Label at the dryer connection if required
For dryer vent installation in Florida, contact Pro Air Chimney at 813-513-7861 or schedule through /contact.

Installation Cost in Florida
Dryer vent installation costs vary based on complexity, materials, and labor.
Typical Cost Ranges
| Installation Type | Cost Range |
|---|---|
| Simple wall termination (short run) | $150-$300 |
| Standard installation (through wall) | $200-$400 |
| Complex routing (attic, multiple floors) | $300-$600 |
| Roof termination | $400-$700+ |
| Material upgrade/replacement only | $100-$250 |
Factors Affecting Cost
- Run length and complexity: More duct, more elbows = higher cost
- Access difficulty: Tight spaces, heights, finished areas add labor
- Materials: Rigid metal costs more than (prohibited) flex duct
- Termination type: Roof terminations require more work than wall terminations
- Permits: Some jurisdictions require permits for new installations
Cost vs. Risk
Proper installation costs more upfront than a DIY job with the wrong materials-but prevents:
- Fire hazards (potential home loss, injury)
- Code violations (failed inspections, fines, insurance issues)
- Appliance damage (overheating shortens dryer life)
- Energy waste (inefficient drying costs money every cycle)
Maintenance After Installation
A proper installation sets you up for success, but ongoing maintenance is essential.
Regular Cleaning Schedule
- Lint screen: Clean every load
- Transition duct area: Check quarterly for lint accumulation
- Full vent cleaning: When airflow decreases or annually for heavy use
Warning Signs That Need Attention
- Drying takes longer than normal
- Clothes feel hot but still damp
- Laundry room feels warmer or more humid during drying
- Weak airflow at the exterior hood
- Burning smell (stop using the dryer immediately)
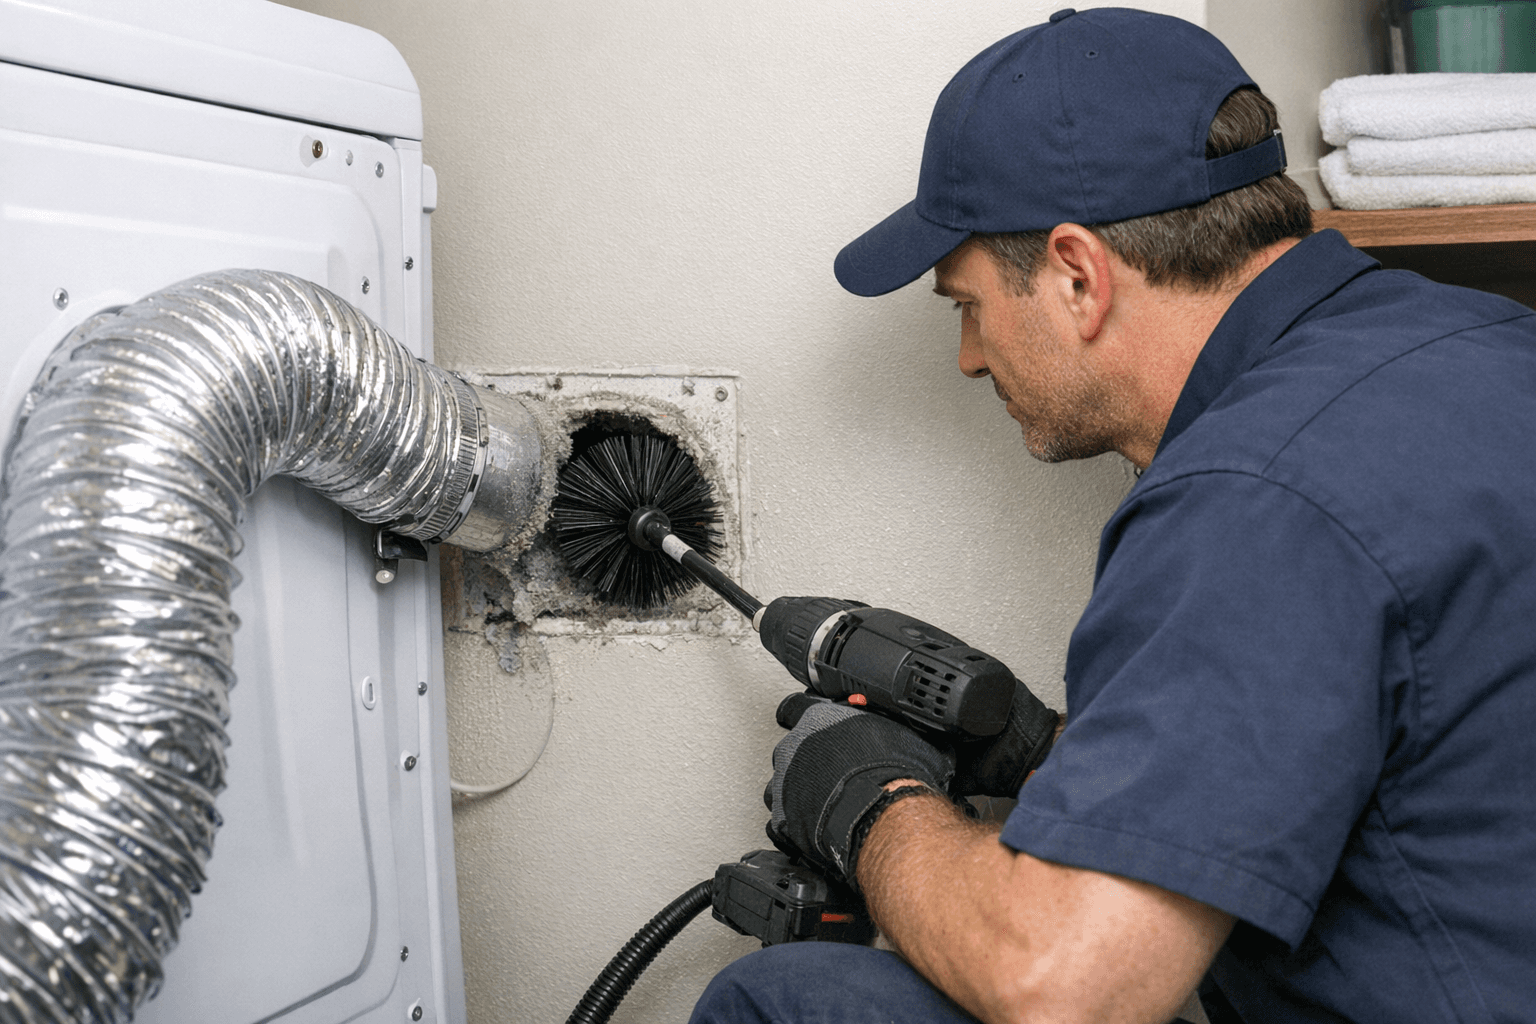
Professional Cleaning
Even well-installed vents accumulate lint over time. Professional cleaning addresses buildup you can't reach from either end: /services/dryer-vent-cleaning
Related Services
Service Areas
Get Professional Dryer Vent Installation
Whether you're installing a new dryer vent, replacing prohibited materials, or correcting a poor installation, proper routing and materials are essential for safety and efficiency.
Call Pro Air Chimney at 813-513-7861 or schedule online.
FAQs
Q: What is the maximum length for a dryer vent? A: Current code (IRC M1502.4.6) allows a maximum of 35 feet from the dryer transition duct connection to the exterior termination. However, each 90-degree elbow deducts 5 feet and each 45-degree elbow deducts 2.5 feet from this allowable length. Always check your dryer manufacturer's specifications, as they may be more restrictive.
Q: Can I use PVC pipe for dryer venting? A: No. PVC and all plastic materials are prohibited for dryer exhaust venting. They are fire hazards, can melt under dryer exhaust temperatures, and generate toxic fumes if they burn. Only rigid smooth metal duct is code-compliant for dryer vent installation.
Q: Why can't I put a screen on my dryer vent? A: Screens quickly clog with lint, blocking airflow completely. This creates a fire hazard and causes the dryer to overheat. Code requires a backdraft damper (no screen) at the termination. The damper keeps pests out when the dryer isn't running while allowing lint and air to pass freely during operation.
Q: Can I vent my dryer into the attic or garage? A: No. Building codes require dryer exhaust to terminate outdoors. Venting into attics, garages, crawl spaces, or any interior space creates moisture problems, mold growth, lint accumulation, and serious fire hazards. This is a major code violation.
Q: What type of duct should I use behind the dryer? A: The transition duct (connecting the dryer to the wall) must be UL 2158A listed, single length, and no longer than 8 feet. Semi-rigid aluminum is the best choice-it maintains its shape better than thin foil and is more fire-resistant. This duct cannot be concealed in walls or ceilings.
Q: How do I calculate equivalent vent length? A: Start with your jurisdiction's maximum (typically 35 feet). Measure the actual duct run length. Then deduct 5 feet for each 90-degree elbow and 2.5 feet for each 45-degree elbow. The remaining number is your allowable straight duct length. If your actual run exceeds this, you need to reroute or use an approved power ventilation system.
Q: Should I hire a professional for dryer vent installation? A: For simple, short runs through an exterior wall, capable DIYers can handle installation. Hire a professional when routing through walls, ceilings, or attics; when the run is long or complex; when roof termination is required; when you're unsure about code requirements; or when correcting a previous improper installation.